How to create a new Role
-
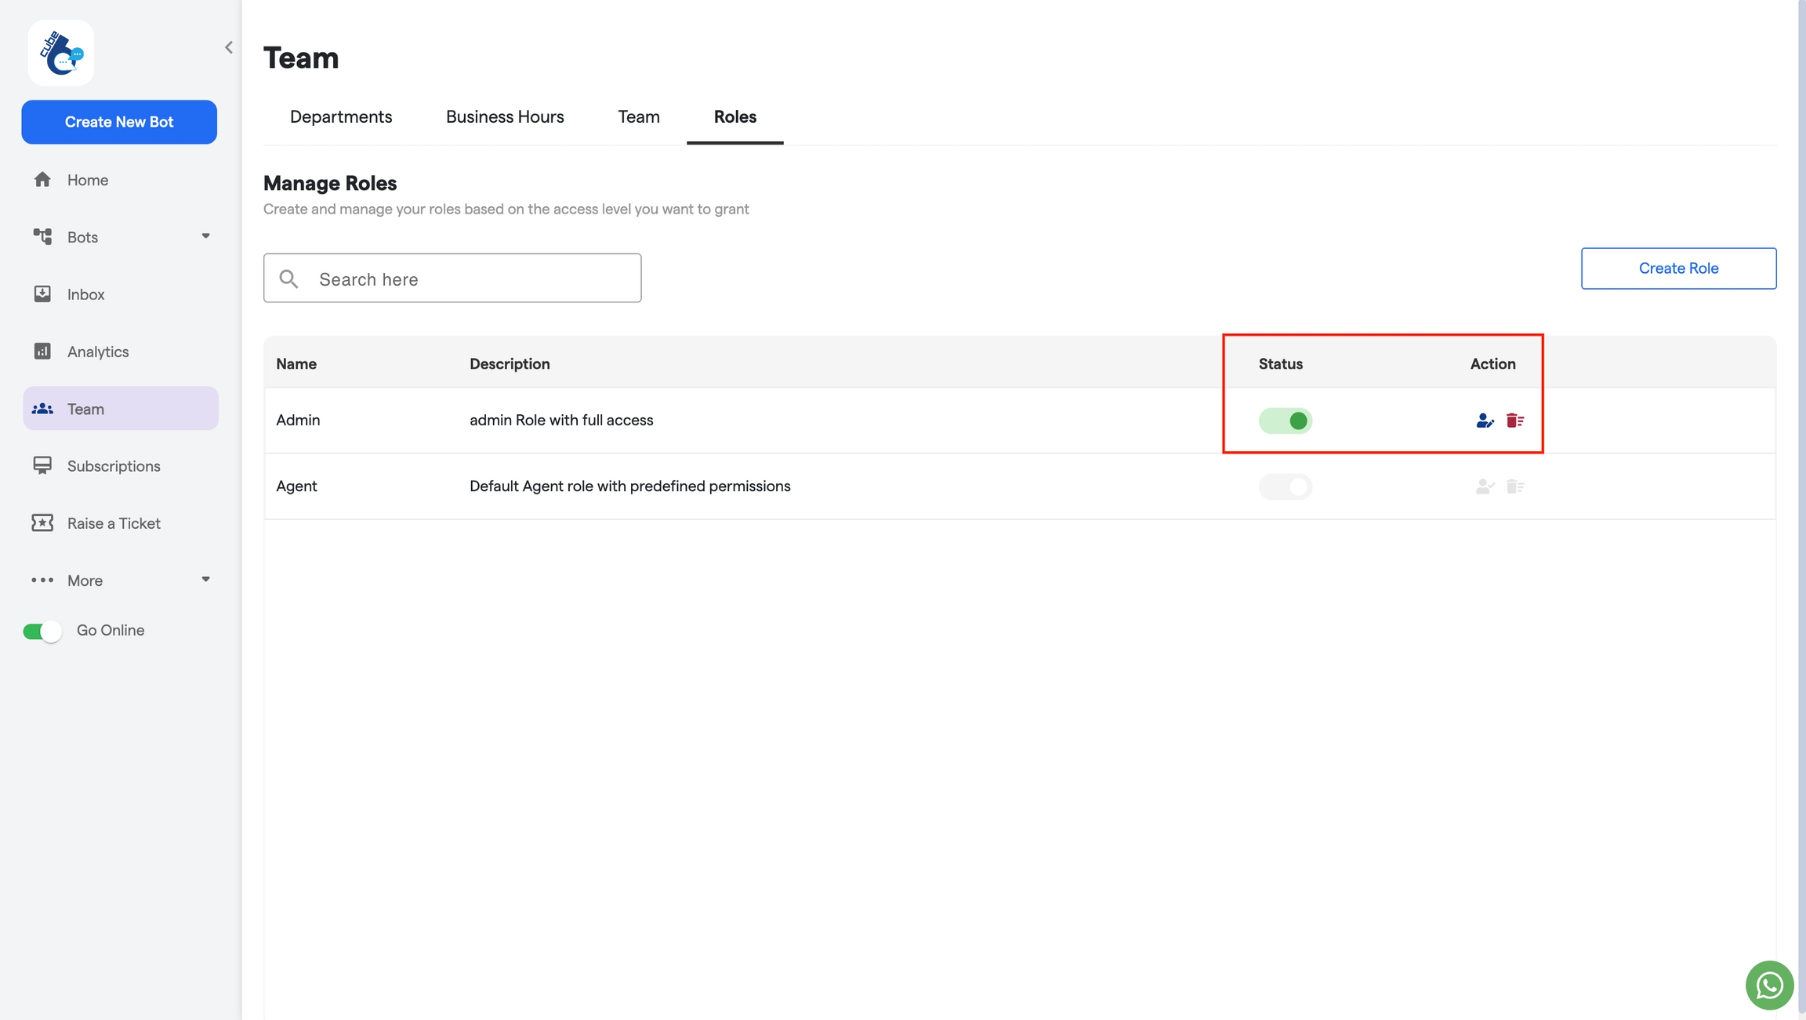
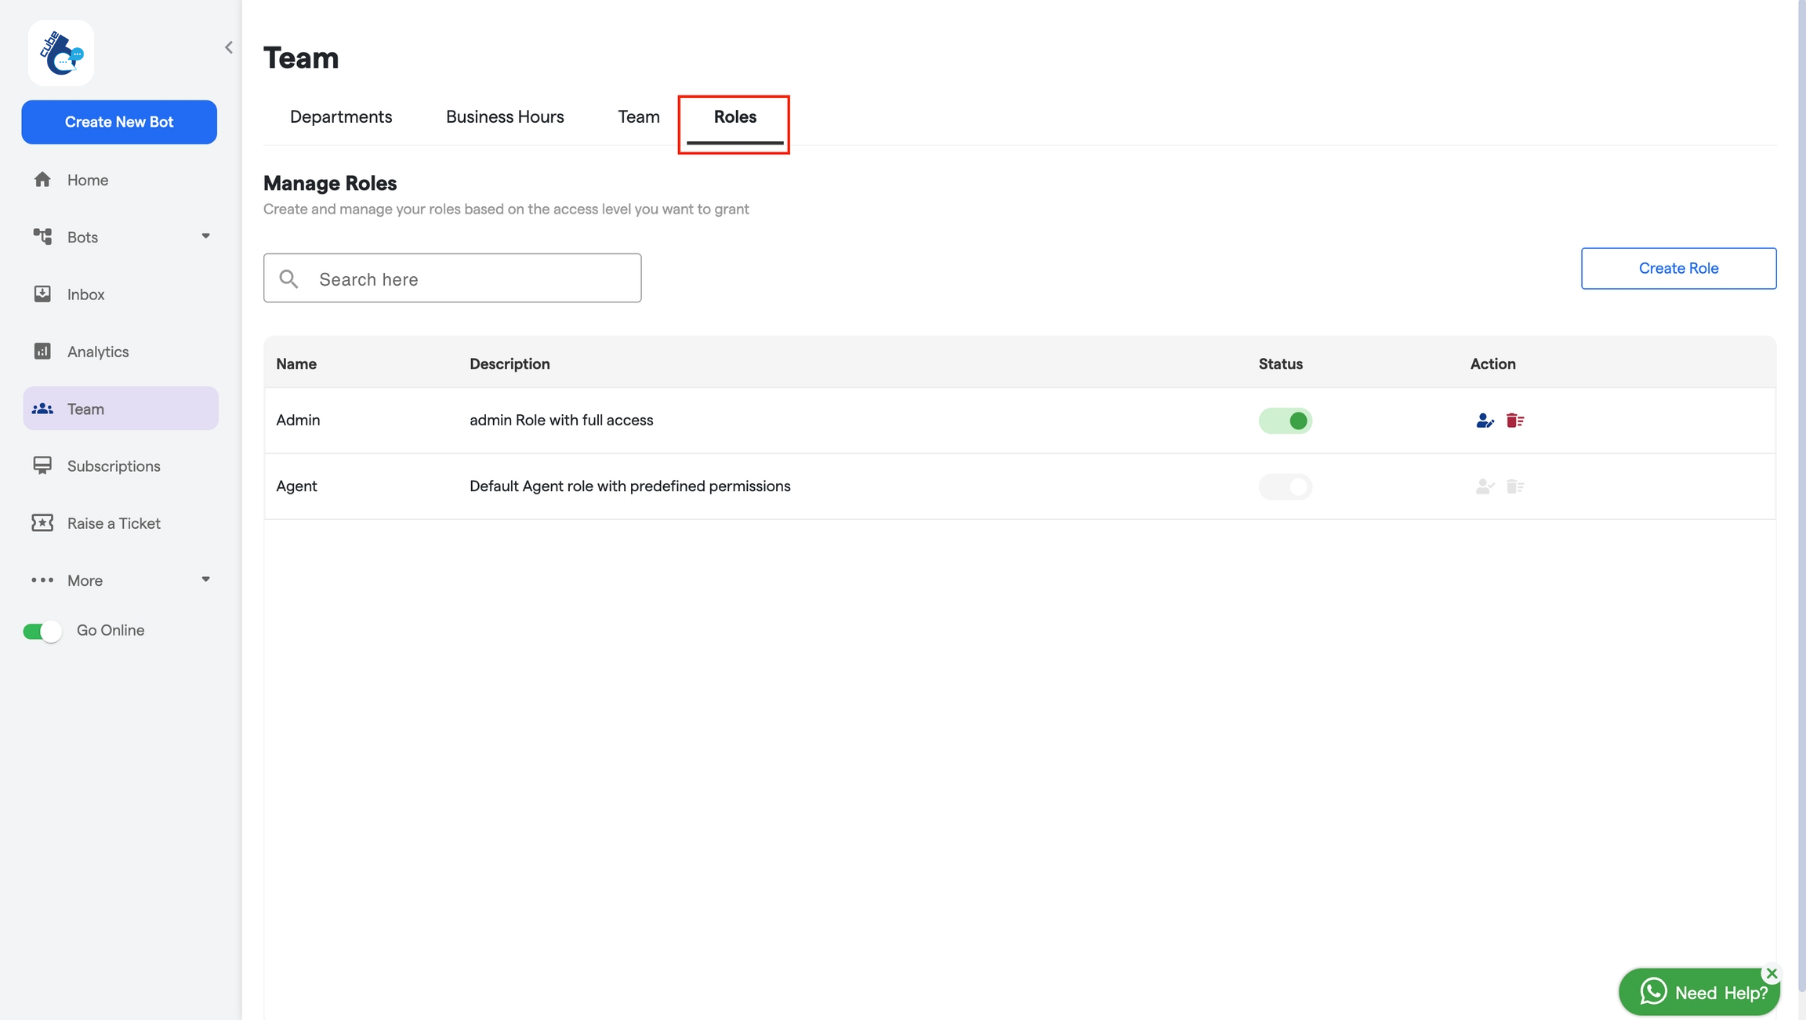
Click on the “Roles” panel to view and manage the roles you have created.
-
Next, click on “Create Role” to start the process of creating a new role.

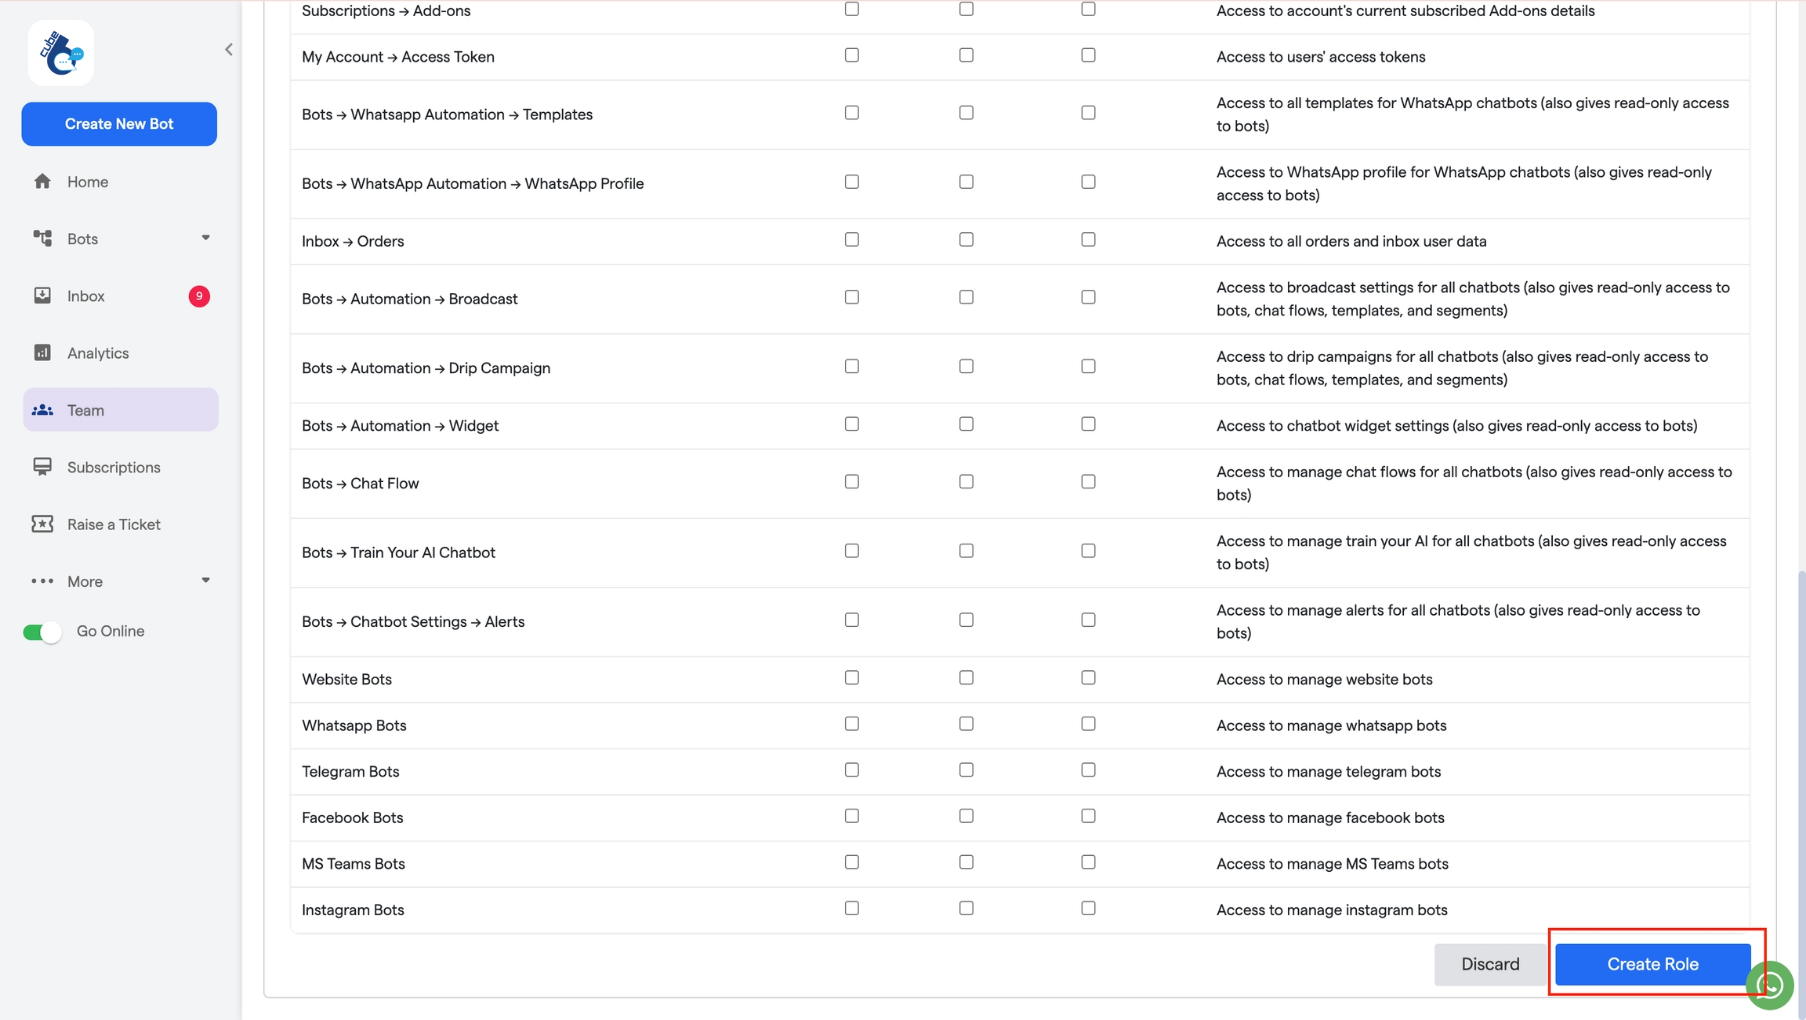
- Add “Name” and “Description” for your role.
-
Assign Permissions: You can select the sections you want to allow or block users from accessing in this role.

- Read Access: Users can view all chats across all chatbots but cannot edit or delete them.
- Write Access: Users can view and edit any chat across all chatbots but cannot delete them.
- Delete Access: Users can view and delete any chat across all chatbots but cannot edit them.
- Status: If the status of a role is “active”, it can be assigned to any team member. If the role is “inactive”, it cannot be assigned to anyone.
-
Action: You can edit or delete any of the existing roles from here.